
👋 Hi, my name is Nicolas Epstein.
Welcome to my personal webpage.
Latest Blog Post
How to sync your devices using a Raspberry Pi and Syncthing
2023-09-27
Intended audience: If you are an advanced user, this article is not for you. Rather, it is more of a step-by-step walkthrough for novice to intermediate users. I don’t assume much beyond the ability to type commands into a terminal. I use a Raspberry Pi 4, but that’s not actually necessary, any computer will do.
In this post, I describe the setup I’ve been using for the past 5 years or so to share files between my devices. This solution allows you to create shared folders that remain in sync across devices. Importantly, this is NOT a full-fledged backup solution (although I will touch on that later on). Additionally, I’ve used this setup successfully to share folders on Linux (Fedora, Arch and Debian-based), Android and Windows. I haven’t used it with macOS, but I expect it would work there too.
In the unlikely event that you’re unfamiliar with the Raspberry Pi, it’s basically a low-power personal computer barely larger than a deck of playing cards. People use the Pi for all kinds of things like running small web servers, retro gaming, air quality monitoring and multimedia centers. You can find more info on the official website.
Syncthing, as their website states, “is a continuous file synchronization program. It synchronizes files between two or more computers in real time”. If you’ve ever used Dropbox, it’s the same idea: it creates a magic folder on your device that can be shared and synced with other devices. Any change you make to a within that folder will be automatically reflected in every device you’ve shared it with.
The great thing about Syncthing, as opposed to Dropbox, is that it’s free open source software (FOSS). Obviously, there’s a trade-off there. As is typically the case, the FOSS solution is not always quite as polished or easy to set up. In my experience, though, Syncthing is an excellent piece of software and I’ve had very few problems with it over the years.
So this is the basic idea: install Syncthing to all the devices you want to keep in sync and then choose folders to share between them.
There are many ways to arrange this network of devices, but what I’ve found to be the most effective is to have one “master” device that all your other devices sync to. This makes for an easy mental model to keep track of and it also makes it easy to add and remove devices in the future. This is where the Raspberry Pi comes in: as a small, silent, and unobtrusive device, the Pi is the perfect candidate for the role of “master”.
Installing Syncthing on the Raspberry Pi
n.b., I run my own Pi “headless”, i.e. without a screen and keyboard/mouse. If you run your Pi with a desktop environment, you can skip the ssh stuff and just run the commands in a terminal.
The following assumes you’ve installed Raspberry Pi OS with SSH enabled (see the first note in the “Enabling the server” section).
I also want to add that if you plan on syncing a lot of data (e.g. >10-20GB), you should consider setting up your Pi to auto-mount a USB hard drive and set up your shared folder there rather than on the standard SD card. There are two reasons for this, one is that SD cards rarely exceed 64GB and they tend to get quite expensive. The other is that SD cards tend to wear out faster when experiencing frequent writes.
Now ssh into your Pi from another computer on the same network:
ssh pi@<your Pi's local IP address>
The default password is “raspberry”.
From here, make sure you’ve updated everything:
sudo apt update && sudo full-upgrade
Next, follow the instructions found here to install Syncthing. As of writing, these are:
# Add the release PGP keys: (you may need to install `curl`)
sudo curl -o /usr/share/keyrings/syncthing-archive-keyring.gpg https://syncthing.net/release-key.gpg
# Add the "stable" channel to your APT sources:
echo "deb [signed-by=/usr/share/keyrings/syncthing-archive-keyring.gpg] https://apt.syncthing.net/ syncthing stable" | sudo tee /etc/apt/sources.list.d/syncthing.list
# Update and install syncthing:
sudo apt update
sudo apt install syncthing
Now, enable/start the associated systemd service. This will ensure Syncthing runs at startup.
systemctl enable syncthing@pi.service
systemctl start syncthing@pi.service
The next step isn’t strictly necessary, but I think it’s good practice. This will install UFW (Uncomplicated Firewall) and ensure the ports for SSH and the Syncthing web interface (more on that later) remain open and accessible.
sudo apt install ufw
systemctl enable ufw # IMPORTANT!! don't start the service just yet! you could end up accidentally locking the SSH port (22)
sudo ufw allow syncthing
sudo ufw allow syncthing-gui
sudo ufw allow ssh
systemctl start ufw
The web interface
You can now close your SSH session. If everything went well you can navigate to “http://<your Pi’s IP address>:8384” and you should be greeted with something like this:
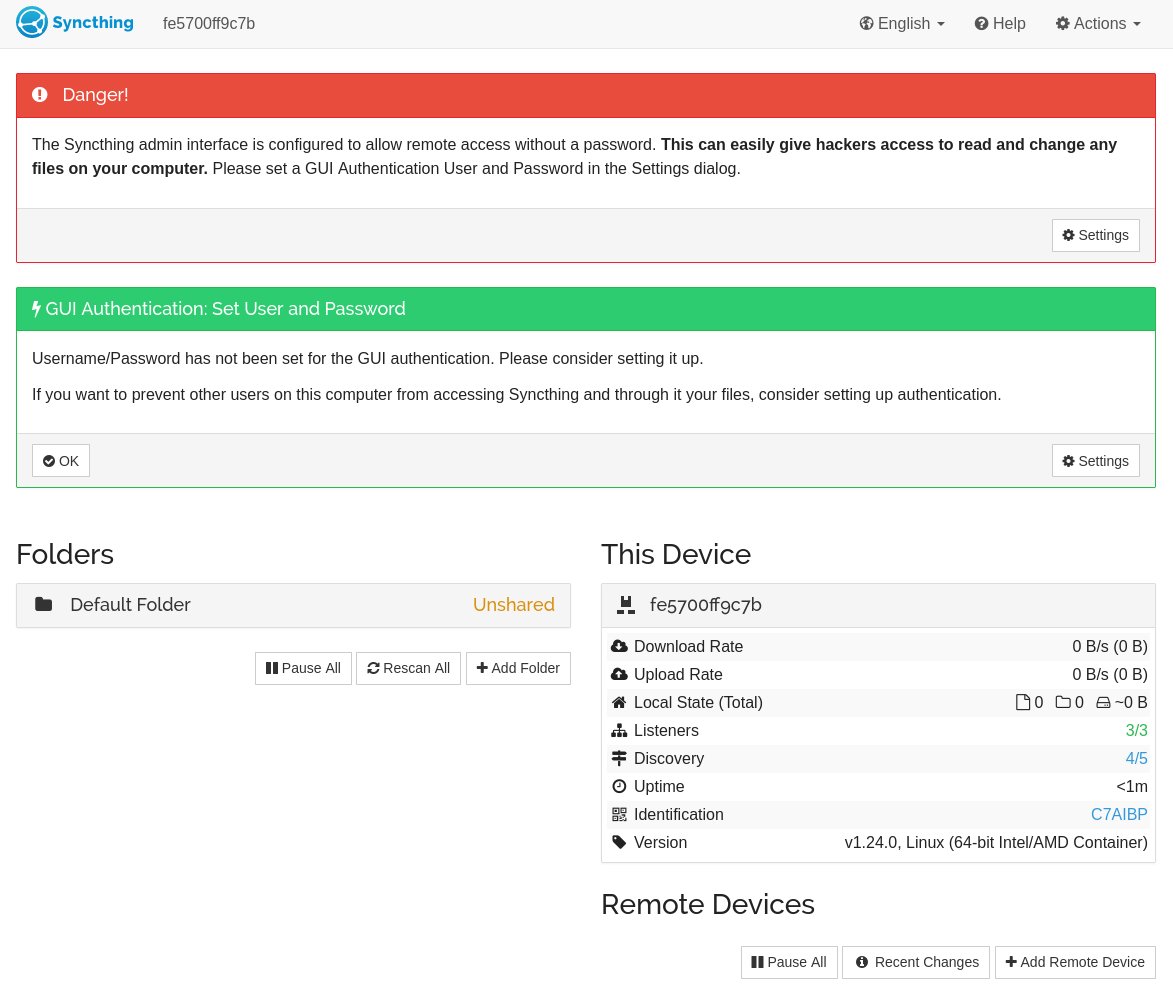
Follow the warning messages and set up a username and password if you wish.
By default, Syncthing will broadcast itself on the internet using a global discovery server. This can be useful if you want to keep things in sync when you are away from home, but if all you want is to have a home network, I recommend you disable that feature. In the settings menu, go to the connections tab and uncheck “Global discovery”.
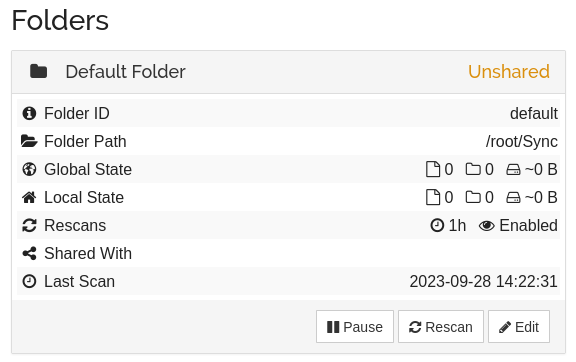
Sharing settings
The next thing you will want to look at is the “Default Folder” that Syncthing has created. Click on it in the main menu, and then click on “Edit”.
From here I recommend you activate file versioning, this will allow you to recover old versions of files in case you accidentally delete or overwrite a file. You don’t have to do this on every device, but doing it here is a good idea. “Simple File Versioning” with the default settings is a good choice.
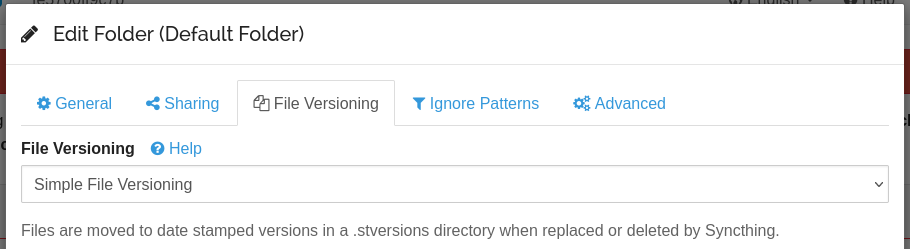
The rest of settings can stay on their defaults.
Setting up your other devices
Installing Syncthing is pretty trivial on most other platforms. Take a look at their excellent website for guidance./
Regardless of your platform, the process of introducing new devices to your network should be the same: once Syncthing is running on a device, and assuming that device has access to the same network as your Pi, open the web interface for your Pi and your device side-by-side (i.e. localhost:8384 and
While it’s possible to have every device connect with every other device, I’ve found that that adds a lot of needless complexity. As I mentioned at the start, I’ve found it best to only connect each device to the Pi.
Wrapping up
Apart from the obvious benefit of sharing documents and pictures across devices, one of the best uses I’ve found for my setup is for storing my password database. I’ve been using Keepass as a password manager for many years. It’s a great piece of free software, but it lacks the cloud syncing of passwords offered by paid services like Bitwarden or 1Password. I used to use Google Drive to store and share my password database, but Drive is not well integrated into Linux, at least it wasn’t last I checked. Now, with Syncthing on the Pi, I just put the password database file in my shared folder and it’s instantly available on all my devices. And on the rare occasions when I accidentally overwrote a password, I was able to retrieve old versions of the file with ease.
When it comes to development, it’s also very practical to have synced folders without needing to set up a GitHub repo or another cloud solution for small projects or one-off files that I want to work on from different machines.
A word of warning: Syncthing is NOT a proper backup solution. As stated on their website, “Syncthing is not a great backup application because all changes to your files (modifications, deletions, etc.) will be propagated to all your devices. You can enable versioning, but we encourage you to use other tools to keep your data safe from your (or our) mistakes.” That being said serving as a network attached storage (NAS) solution is an excellent usecase for the Pi and I do so myself, but that’s a story for another time.
I hope this article has been useful for you!